I wrote about how to accept self-signed SSL certificates for Selenium 1 almost 3 years ago. At the time, Selenium 2 hadn’t seen an official release yet so I was sticking with the more stable Selenium 1 (now the Selenium RC protocol in Selenium 2). A lot has changed in the world of Selenium since then and I thought it was time to provide a new post with modern information, based upon the Selenium WebDriver drivers. If you’re looking for info on Selenium RC, please read the older article as it is still relevant.
Built-in Driver Support
Unlike Selenium RC, the individual browser drivers in Selenium WebDriver are authored in a native language suitable for that browser. This affords the drivers much greater flexibility in how they can influence the browser. As a result, handling self-signed SSL certificates is trivial in the following browsers:
- Firefox
- Chrome
- Android
Firefox and Chrome handle the issue of self-signed certificates by default, so no additional configuration is required. Android requires a bit more work, however. When starting the driver, you must pass the acceptSslCert desired capability, with the value true. After that, everything should work just fine.
Support Via Proxy
Not all browser drivers are able to override the browser’s SSL security warnings, however. In these cases you’ll need to use the same technique as with Selenium RC: run a proxy server that intercepts the bad SSL certificates and re-encrypts the call using a certificate that the browser trusts. The following browsers require this method:
- Internet Explorer
- Opera
- Safari
While you could use the Selenium RC Server as your SSL proxy, a much better option is to use BrowserMob Proxy. The Selenium RC Server proxy is deprecated and is maintained just enough to keep it functional. BrowserMob Proxy is a fork of that codebase that has matured with new features and bug fixes.
Note that in order for the browser to handle the re-encrypted connection to BrowserMob Proxy it must trust the CyberVillains certificate. This trust relationship is normally established by installing the certificate as a trusted root in your operating system.
Warning!
For security reasons, you should never trust the CyberVillains certificate on a machine that is not dedicated to testing as you may open yourself up to man-in-the-middle attacks or phishing schemes.Installing the CyberVillains Certificate on Windows
First, you need to install the CyberVillains certificate in order for SSL connections to BrowserMob Proxy to succeed. The certificate is shipped as part of the BrowserMob Proxy distribution and can be found $install_directory/ssl-support/. Figures 1 – 7 illustrate the installation process.
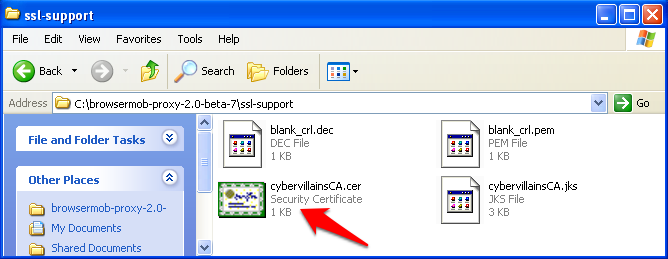 Figure 1: Double-click the CyberVillains certificate in the BrowserMob Proxy distribution.
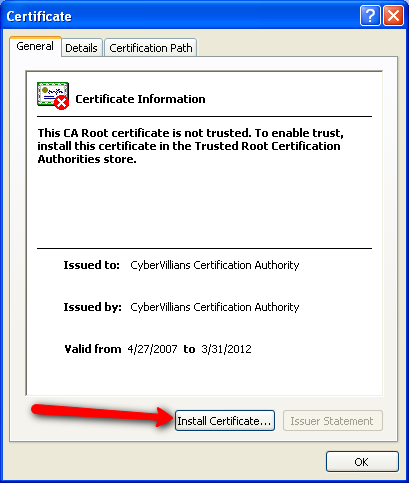 Figure 2: Install the CyberVillains certificate.
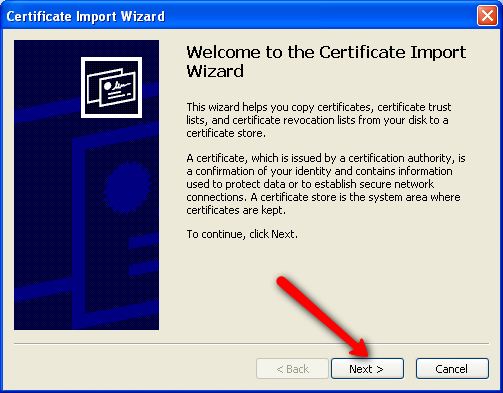 Figure 3: Click through the SSL certificate import wizard.
 Figure 4: Choose the Trusted Root Certification Authorities certificate store.
 Figure 5: Complete the import.
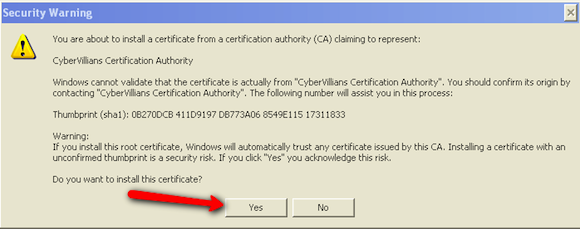 Figure 6: Accept the security warning.
 Figure 7: Wrap everything up.
Using BrowserMob Proxy
Once you have the CyberVillains certificate installed, you’re ready to run the BrowserMob Proxy server. Its README has info on how to use the proxy. But in its simplest form, we’ll just start the proxy up:
$ /opt/browsermob-proxy/bin/browsermob-proxy --port 8080
Figure 8: Starting up BrowserMob Proxy.
Now you need to pass the proxy configuration when starting your driver:
    require 'selenium/webdriver'
    require 'browsermob-proxy'

    proxy = BrowserMob::Proxy::Client.from "http://localhost:8080/"

    desired_caps = Selenium::WebDriver::Remote::Capabilities.internet_explorer(
      :proxy => proxy.selenium_proxy(:http, :ssl))

    driver = Selenium::WebDriver.for(:remote,
      :url => "http://localhost:4444/wd/hub", :desired_capabilities => desired_caps)
Where things get tricky is not all drivers have the ability to specify the proxy. As of Selenium 2.31.0, for instance, there’s no way to configure the proxy for Safari. Should you encounter a driver like this, you’ll need to configure the browser manually. By default, most browsers on Windows (including Safari) will use the system proxy settings. Thus, if you can modify the system proxy, your browsers will automatically pick up those changes even if the driver doesn’t yet support proxy configuration.
Figure 10 shows a sample snippet that can be used to set up the Windows system proxy in Ruby.
    require 'win32/registry'

    key = Win32::Registry::HKEY_CURRENT_USER.open(
      'Software\Microsoft\Windows\CurrentVersion\Internet Settings', Win32::Registry::KEY_WRITE)

    begin
      key.delete('AutoConfigURL')
    rescue => e
      # This will raise if the registry value doesn't exist.
      # Since reading if it doesn't exist will also raise, I'm not sure how to
      # check for the value's presence before attempting to delete it.
    end

    # Set these values to wherever you're running your BrowserMob Proxy.
    # browsermob_proxy_host = 'localhost'; browsermob_proxy_port = 8020

    key['ProxyServer'] = "#{browsermob_proxy_host}:#{browsermob_proxy_port}"
    key['ProxyOverride'] = '<local>'
    key['MigrateProxy'] = 1
    key['ProxyEnable'] = 1
With your driver configured for the proxy, you’re free to navigate to URLs that use self-signed certificates. No further configuration is necessary.
Conclusion
To recap, accepting self-signed certificates in Selenium 2 is dependent on the driver being used. The proxy installation method works with nearly every driver, but is overkill for those drivers that natively support accepting self-signed SSL certificates. Notably absent from the list above is the iOS driver, which neither can accept self-signed certificates nor can configure the proxy. In this case, you may want to look into the 3rd party ios-driver project, which can handle self-signed SSL certificates.
One final note is that these approaches won’t just handle self-signed SSL certificates, but rather any SSL problem, such as an expired certificate. Since you’ll be ignoring these problems, you should ensure you have an external process test for the validity of any critical certificates.